Bento.me is a no-code platform for creating personal homepages, known for its elegant design and ease of use.
But it has one drawback: it doesn’t support custom domains.
Don’t worry though — this article will walk you through the simplest, zero-cost method to bind a custom domain to your Bento.me page.
1. Prerequisites
- You need to have a Bento.me personal page
- Register / prepare a Cloudflare account
- Own an independent domain and transfer its DNS management to Cloudflare
2. Create a Cloudflare Worker Project
Enter the following command in your terminal to create a basic Cloudflare Worker:
npm create cloudflare@latest
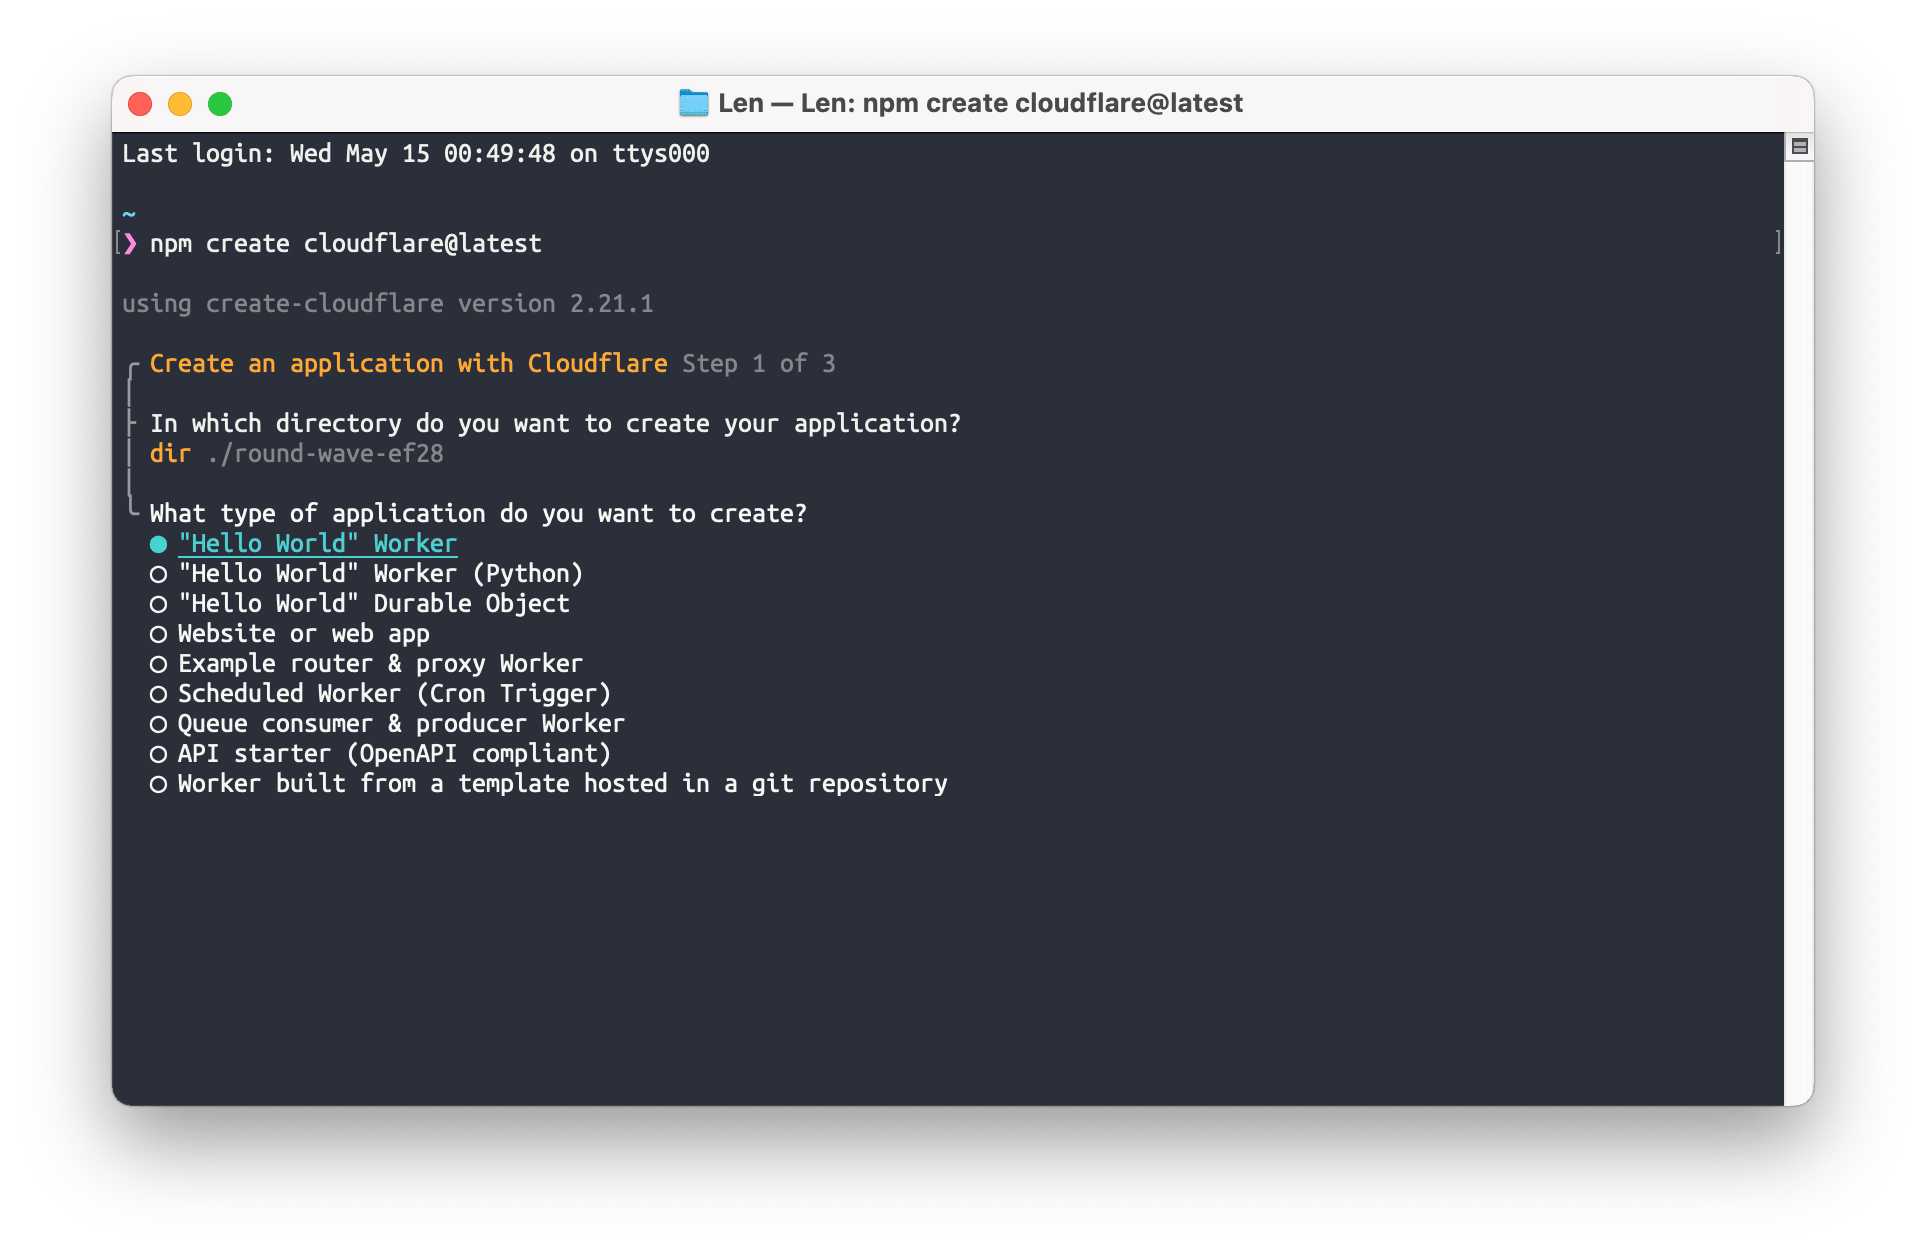
Then follow the prompts in the terminal:
-
In which directory do you want to create your application?
- Default or custom — either is fine
-
What type of application do you want to create?
- Select “Hello World” Worker
-
Do you want to use TypeScript?
- Select NO (use the arrow keys to choose)
-
Do you want to use git for version control?
- Select Yes
-
Do you want to deploy your application?
- Select Yes (if this is your first time, it will automatically open a browser for login)
Once complete, a folder will appear in the corresponding directory. Open it with a code editor such as Visual Studio Code.
3. Set Environment Variables
- Edit the
wrangler.tomlfile and add the following at the end:
[vars]
BENTO_USERNAME = "len" # Replace with your Bento page ID — mine is bento.me/len
BASE_URL = "https://bento.imzl.com" # Replace with your custom domain- Create a
.dev.varsfile in the project root directory and paste the following:
BENTO_USERNAME="len" # Replace with your Bento page ID
BASE_URL="http://127.0.0.1:8787"
4. Create the Worker
- Edit the
/src/index.jsfile and replace its contents with the following:
/*
 * Setting up a custom domain for Bento.me
 * Author: len
 * Details: https://imzl.com/bento-add-domain
 * Original source: https://jayfranco.hashnode.dev/
 */

// Event listener
addEventListener('fetch', event => {
  // When a fetch event occurs, respond with the result of handleRequest
  event.respondWith(handleRequest(event.request));
});

// Parse response based on content type
async function parseResponseByContentType(response, contentType) {
  // If there's no content type, return the response as text
  if (!contentType) return await response.text();

  // Handle differently based on content type
  switch (true) {
    case contentType.includes('application/json'):
      // If JSON, return as a JSON string
      return JSON.stringify(await response.json());
    case contentType.includes('text/html'):
      // If HTML, use HTMLRewriter to transform the response
      const transformedResponse = new HTMLRewriter()
        .on('body', {
          element(element) {
            // Custom CSS and JS can be added to the HTML page here
            element.append(
              `
                <style>
                  // Add your custom CSS here
                </style>
                `,
              { html: true },
            );
            element.append(
              `
                <script>
                  // Add your custom JS here
                </script>
                `,
              { html: true },
            );
          },
        })
        .transform(response);
      // Return the transformed response as text
      return await transformedResponse.text();

    case contentType.includes('font'):
      // If the content type is a font, return as ArrayBuffer
      return await response.arrayBuffer();

    case contentType.includes('image'):
      // If the content type is an image, return as ArrayBuffer
      return await response.arrayBuffer()

    default:
      // For all other content types, return as text
      return await response.text();
  }
}

// Function to handle all requests
async function handleRequest(request) {
  // Extract the path from the request URL
  const path = new URL(request.url).pathname;
  // By default, the URL is set to "https://bento.me" + path
  let url = 'https://bento.me' + path;

  // If the path contains 'v1', change the URL to 'https://api.bento.me' + path
  if (path.includes('v1')) {
    url = 'https://api.bento.me' + path;
  }

  // If the URL is "https://bento.me/", append the BENTO User ID
  if (url === 'https://bento.me/') {
    url = 'https://bento.me/' + BENTO_USERNAME;
  }

  // Define basic headers for the fetch request
  let headers = {
    'Access-Control-Allow-Origin': '*',
    'Access-Control-Allow-Methods': 'GET,HEAD,POST,OPTIONS',
  };

  // Fetch the URL with the defined headers
  const response = await fetch(url, { headers });

  // Extract the content type from the response headers
  const contentType = response.headers.get('content-type');

  // Parse the response based on content type
  let results = await parseResponseByContentType(response, contentType);

  // If the result is not an ArrayBuffer,
  // replace all calls to the bento API with our BASE_URL
  // This is a workaround for CORS errors
  if (!(results instanceof ArrayBuffer)) {
    results = results.replaceAll('https://api.bento.me', BASE_URL);
  }

  // Add the content type to the headers
  headers['content-type'] = contentType;

  // Return a new response with the results and headers
  return new Response(results, { headers });
}- Navigate to the project folder in your terminal and run the code to preview:
npm run dev- Once everything looks good, deploy to production:
npm run deploy5. Configure the Custom Domain in Cloudflare
- First, make sure the domain you want to bind has its DNS managed by Cloudflare.
- Go to “Workers and Pages” and find the Worker project you just pushed.
- Under “Settings - Triggers,” add your custom domain and wait for it to take effect.
- Now you can visit bento.imzl.com to see your Bento page.