使用 Cloudflare Workers 为 Bento.me 设置自定义域名
Bento.me 是一个零代码创建个人主页的平台,以优雅美观的界面和使用简单而闻名。
但它唯一的缺点是:不支持自定义域名
但别担心,本文将用最简单、零成本的方式,帮助你为 Bento.me 绑定自定义域名。
1. 提前准备
- 你需要有一个 Bento.me 个人页面
- 注册/准备一个 Cloudflare 账号
- 拥有独立域名,并将其转移至 Cloudflare 管理 DNS
2. 创建 cloudflare Worker 项目
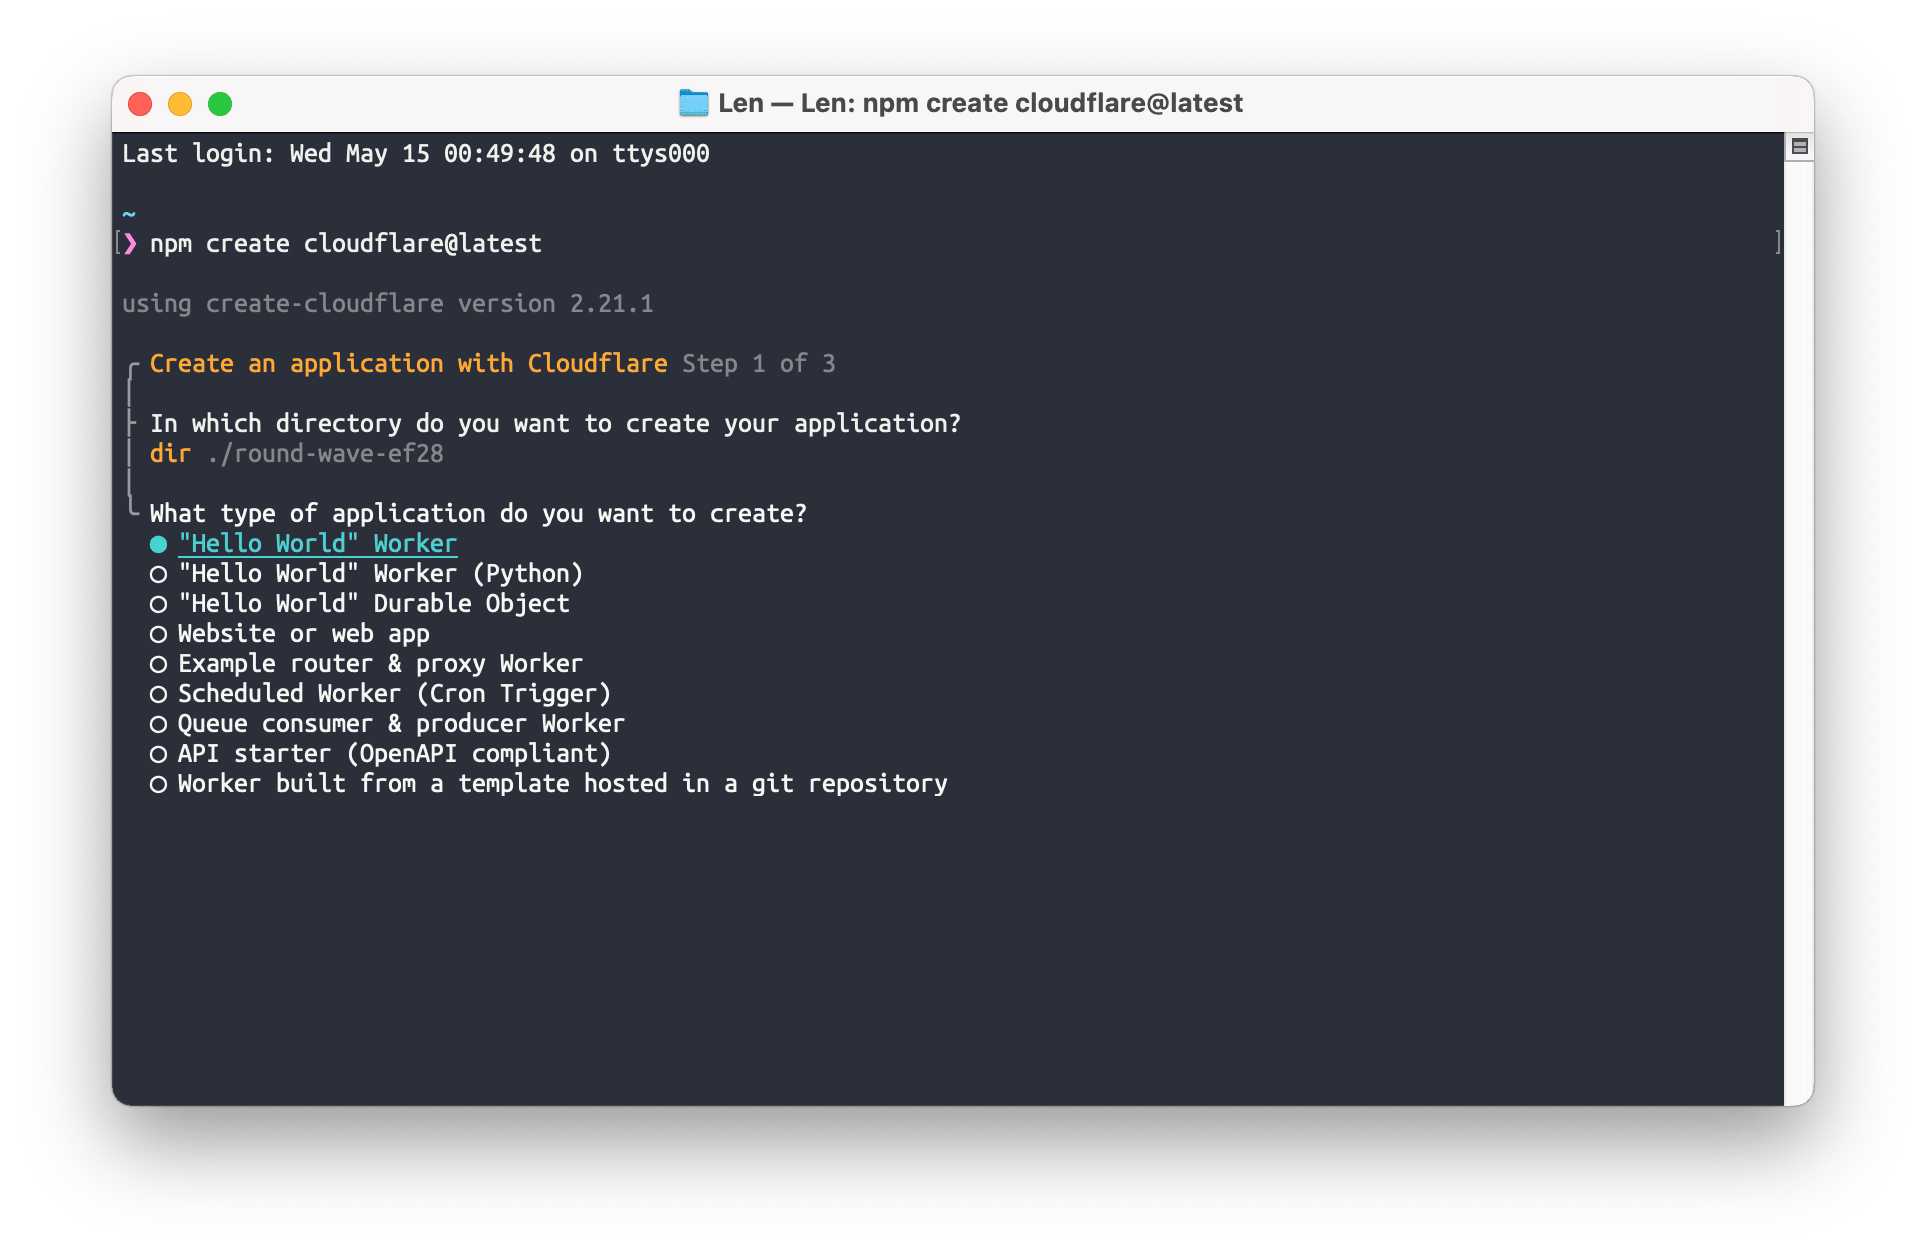
在终端中输入以下命令,创建一个基础的 Cloudflare Worker:
npm create cloudflare@latest

然后按照终端内说明进行操作:
-
In which directory do you want to create your application? 你现在哪个目录创建应用
- 默认或者自定义都可
-
What type of application do you want to create? 你想创建什么类型的应用?
- 选择 “Hello World” Worker 即可
-
Do you want to use TypeScript? 你想使用 TypeScript 吗?
- 选择 NO(用键盘→选择)
-
Do you want to use git for version control? 你想使用 Git 进行版本控制吗?
- 选择 Yes
-
Do you want to deploy your application? 你想部署应用么?
- 选择 Yes(如果你第一次使用,会自动打开网页要求登录)
完成后对应目录会出现一个文件夹,使用 Visual Studio Code 等代码编辑工具打开这个文件夹。
3. 设置环境变量
- 编辑
wrangler.toml文件,在末尾添加下列内容:
[vars]
BENTO_USERNAME = "len" # 替换为你的 Bento 页面 ID,我的是 bento.me/len
BASE_URL = "https://bento.imzl.com" # 替换为你的自定义域名- 在文件夹根目录创建
.dev.vars文件,黏贴下列内容:
BENTO_USERNAME="len" # 替换为你的 Bento 页面 ID
BASE_URL="http://127.0.0.1:8787"
4. 创建 Worker
- 编辑
/src/index.js文件,替换为下列内容:
/*
 * 为 Bento.me 设置自定义域名
 * 作者:len
 * 详情:https://imzl.com/bento-add-domain.html
 * 源代码来源:https://jayfranco.hashnode.dev/
 */

// 事件监听
addEventListener('fetch', event => {
  // 发生 fetch 事件时,用 handleRequest 函数结果做出响应
  event.respondWith(handleRequest(event.request));
});

// 根据内容类型解析响应
async function parseResponseByContentType(response, contentType) {
  // 如果没有内容类型,响应以文本形式返回
  if (!contentType) return await response.text();

  // 根据内容类型不同,采取不同的操作
  switch (true) {
    case contentType.includes('application/json'):
      // 如果是 JSON,以 JSON 字符串形式返回
      return JSON.stringify(await response.json());
    case contentType.includes('text/html'):
      // 如果是 HTML,则使用 HTMLRewriter 对 response 进行转换
      const transformedResponse = new HTMLRewriter()
        .on('body', {
          element(element) {
            // 自定义 CSS 和 JS 可添加到 HTML 页面中
            element.append(
              `
                <style>
                  // 在这里输入你需要的自定义 CSS
                </style>
                `,
              { html: true },
            );
            element.append(
              `
                <script>
                  // 在这里输入你需要的自定义 JS
                </script>
                `,
              { html: true },
            );
          },
        })
        .transform(response);
      // 转换后的 response 以文本形式返回
      return await transformedResponse.text();

    case contentType.includes('font'):
      // 如果内容类型是字体,响应将以 ArrayBuffer 形式返回
      return await response.arrayBuffer();

    case contentType.includes('image'):
      // 如果内容类型是图片,响应将以 ArrayBuffer 形式返回
      return await response.arrayBuffer()

    default:
      // 如果内容类型是其他类型,响应将以文本形式返回
      return await response.text();
  }
}

// 处理所有请求的函数
async function handleRequest(request) {
  // 从请求 URL 中提取路径
  const path = new URL(request.url).pathname;
  // 默认情况下,URL 设置为 "https://bento.me" + 路径
  let url = 'https://bento.me' + path;

  // 如果路径包含'v1',URL 将更改为 'https://api.bento.me' + 路径
  if (path.includes('v1')) {
    url = 'https://api.bento.me' + path;
  }

  // 如果 URL 为 "https://bento.me/",URL 将更改为 https://bento.me/' 后加上 BENTO User ID
  if (url === 'https://bento.me/') {
    url = 'https://bento.me/' + BENTO_USERNAME;
  }

  // 为 fetch 请求定义基本的 headers
  let headers = {
    'Access-Control-Allow-Origin': '*',
    'Access-Control-Allow-Methods': 'GET,HEAD,POST,OPTIONS',
  };

  // 使用定义的 headers 获取 URL
  const response = await fetch(url, { headers });

  // 从响应 headers 中提取内容类型
  const contentType = response.headers.get('content-type');

  // 根据内容类型解析响应
  let results = await parseResponseByContentType(response, contentType);

  // 如果结果不是 ArrayBuffer
  // 将所有对 bento API 的调用替换为我们的 BASE_URL
  // 这是解决 CORS 错误的临时方案
  if (!(results instanceof ArrayBuffer)) {
    results = results.replaceAll('https://api.bento.me', BASE_URL);
  }

  // 将内容类型添加到 headers
  headers['content-type'] = contentType;

  // 返回带有结果和 headers 的新响应
  return new Response(results, { headers });
}- 通过终端进入文件夹,运行代码查看页面:
npm run dev- 查看无误后,部署到正式环境
npm run deploy5. 在 Cloudflare 配置自定义域名
- 先确保你需要绑定的域名 DNS 已经设置为 Cloudflare;
- 进入「Workers 和 Pages」找到刚才 Push 的 Worker 项目;
- 在「设置 - 触发器」中添加自定义域名并等待生效即可;
- 现在,你可以访问 bento.imzl.com 查看我们的 Bento 页面了。